Pavlova

IMG_2690

A more “refined” pavlova than I’m used to. Usually I would just roughly spread the meringue onto a baking sheet, bake then top with copious amounts of fruit and chantilly cream. This one involved drawing a template for the base and piping little rosettes all the way round to contain the cream. Oh and cutting up the fruits and arranging in a nice way on the pavlova. I do like the more refined look, it tastes the same so why not spruce it up a bit :)

IMG_2692

This recipe calls for quite a bit of sugar which means that it needs to be added to the egg whites more gradually and more time needs to be taken to whisk it in properly so that the whites stiffen enough to be piped. We had to whisk the meringue in true Westking style (no machines allowed!) and several of us had problems getting the egg to stiff peaks. We just about whisked our arms off, wondering whether there had been some grease in the bowl or whether we had added our sugar too quickly… in any case Chef took pity on us and let us get the mixer out :p

Makes approx 6 portions

3 egg whites
120g caster sugar
1/2 teaspoon vanilla
1/2 teaspoon white wine vinegar
1 teaspoon cornflour

1) Gradually whisk the sugar into the egg whites, until stiff peaks form.

2) Gently fold in the vanilla, vinegar and cornflour.

3) Pipe into a circle onto a silicon mat or baking paper and with a star nozzle pipe small little “twists” of meringue all around the edge. Bake for 50-60mins on 150c until the outside is crisp but the inside is still soft.

4) Leave to cool then fill the centre with whipped cream and any fresh fruit you like.

More Sugarwork

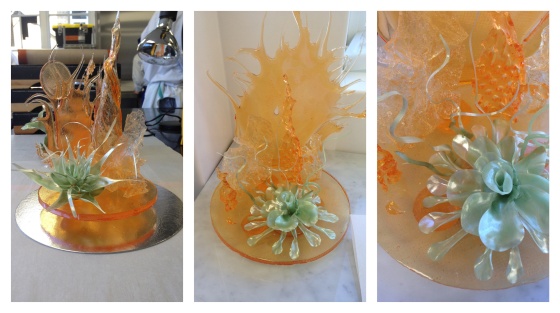
For week two of our sugar work classes we used isomalt, an artificial sugar substitute which is slightly easier to work with and once hardened lasts much longer. Because sugar easily absorbs water our roses from the previous week had completely melted overnight simply from the humidity in the air. These isomalt sculptures can last for a few weeks.

sugar

Left: Chef’s example Centre: my attempt Right: closeup

Our task was to create a sugar centrepiece using different techniques to craft pieces for the backdrop. It was great to get to be more creative with the sugar. We used textured silicon mats to get different patterns onto the sugar before letting it set up and then heating it again slightly so that it could be twisted and bent into different shapes. It was difficult to be creative with the flower in the foreground, mainly because I feel we don’t have the skills to be able to make realistic looking flowers. So I went for the “sci-fi” look, not entirely effective, but the best I could do with my one good hand.

IMG_2336

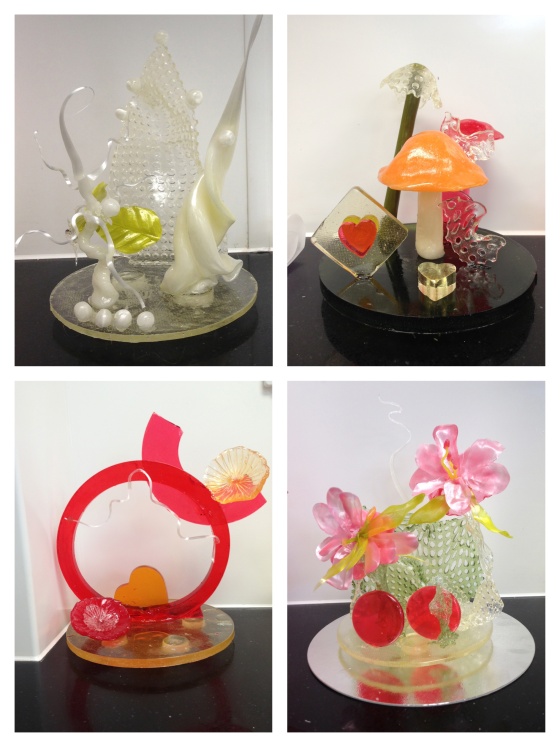
For our third week of gritted teeth and heat blisters we were given free rein to make our own designs. At home before class we had to sketch out the idea for our mini centrepiece (also good practice for our final exam in which we’ll have to plan and execute a much larger centrepiece of either sugar, chocolate, pastillage or a mix of the three mediums).

I decided to go for calla lilies, a fairly simple shape and if done properly ought to look effective…

IMG_2332

IMG_2331

IMG_2334

I didn’t want to use too many colours just so that it wouldn’t look too fussy and overwhelming, but with hindsight I think I should have broken up the red with some other colours, or even chosen a less intense colour. Overall I was happy with my mini centrepiece because I achieved what I had planned, but I still have a lot to learn when it comes to designing and understanding what looks effective and what doesn’t when designs are then realised.

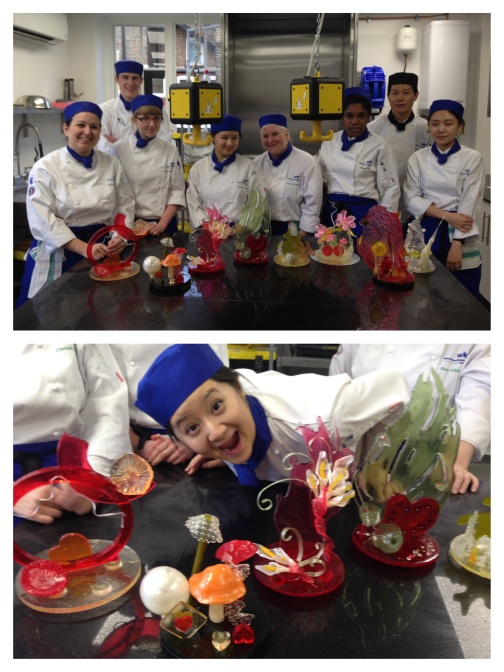
These are some of my classmates’ creations, aren’t they beautiful?

sugar1I feel like with sugar work, unless you’re really good, abstract is better and different colours should not be shied away from.  Fingers crossed I can make the sugar work better for me in our final exam.

sugar2

Coffee Gateau Distinction

IMG_2497

Just before Christmas we had another assessment in which we had to make a coffee gateaux with chocolate garnishes and marzipan coffee beans. It’s a delicious genoese sponge layered with coffee buttercream, all of which, might I add, was made entirely by hand, no kitchen aid allowed! Cue burning arm muscles. Well in any case the sweat makes it all taste nicer don’t you think? :p

IMG_2328

I was very happy and surprised to learn that my efforts, by some fluke,  had earned me a distinction (one of only two so far on the course).

Forgive me now whilst I quote what our lecturer wrote on the marking sheet as this will probably be the only distinction I get!

“Excellent presentation, layering very good. Chocolate garnishing excellent and texture and flavour also good. Bit more buttercream needed on the sides, but otherwise great job!”

Purple Bread?

IMG_2671

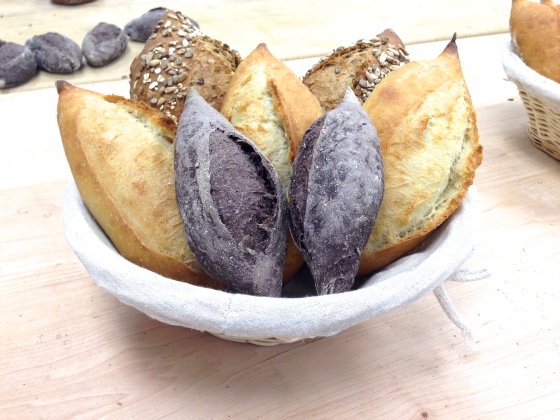
We were introduced to a very interesting bread in bakery this week- Cabernet grape bread. It gets its distinctive purple colour from the Cabernet grape powder which is added to the dough.

IMG_2675

Cabernet grape powder is a by-product of the wine making process where the grape skins are dehydrated and powdered. The powder then can be mixed with flour and used to make breads and pastas. It is said that the it has a same antioxidant properties of red wine, just without the alcohol!

IMG_2678

The grape powder  gives the bread a distinctive purple hue, and a lovely wine-y taste which goes well with a good lump of cheese. Personally I’m not a wine drinker so this isn’t my favourite kind of bread, but doesn’t  it look so pretty against the regular coloured loaves? :)
IMG_2682

Pizza, Grissini and Pine Nut Slices

IMG_2427

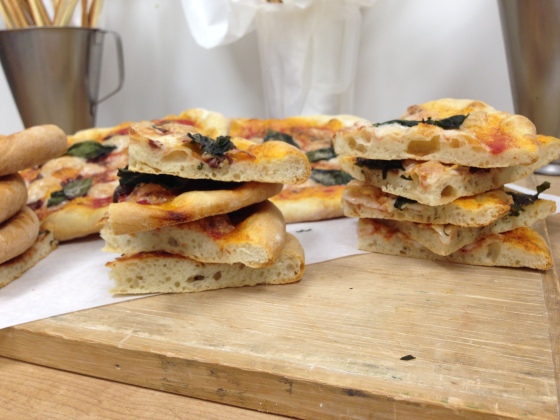
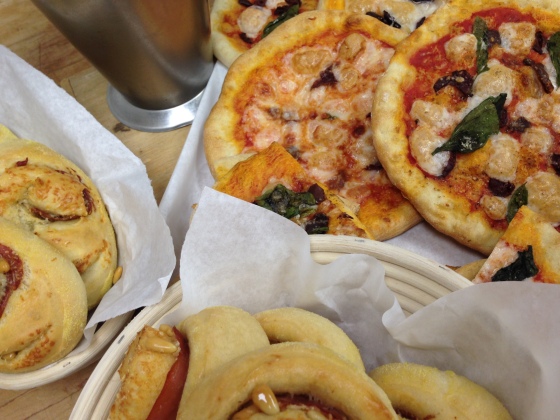
I was so excited for Italian week in our bakery class, most of all because our class is from 2pm-8pm so that night we had freshly baked pizza for dinner!

The pizza bases were made from a basic olive oil dough (500g flour, 15g fresh yeast, 20g semolina, 50g olive oil, 325g water and 10g salt), rolled out and stretched into mini pizza bases and then topped with the usual tomato sauce and mozzarella. We also added basil and olives.

IMG_2430

We also made grissini (thin twisted breadsticks), which were absolutely delicious. They have parmesan in them which gives a lovely taste and a very slight chewy texture when they first come out of the oven.

375g flour
25g parmesan
10g fresh yeast
10g salt
200ml warm milk
50g butter

Simply blend the yeast and salt with the flour (the method can be found in Dough by Richard Bertinet).

Next mix in the parmesan and milk. Work in the bowl until the mixture is uniform in texture, then work on the table top until no longer sticking (again, the method can be found in Bertinet’s book).

Finally, rest for about 30 minutes, mould and bake.

IMG_2432

The grissini are perfect for serving at dinner parties. They are so quick and easy to whip up (especially as they only need 30 minutes resting time) and they are absolutely delicious.

The recipes for the pizza dough an pine nut slices can also be found in Bertinet’s book, which I can thoroughly recommend if you are looking for a new bread book. I think I mentioned previously that we are learning his method of bread baking (one which does not involve pummelling and flaying the poor dough to within an inch of its life!) and it really does take the mystery and guess work out of the process. Try it, you’ll be surprised to learn that dough does not need to be beaten into submission!

IMG_2433

Molten Sugar and Burns

Molten Sugar and Burns

Over a painful three week period we were introduced to sugar work. I’m not going to pretend I enjoyed it (or was good at it for that matter); for our virgin hands it was a rather unpleasant experience which left … Continue reading

Christmas at Westking

IMG_2452

In the run up to Christmas we were also hard at work putting together our Christmas chocolates. After a couple of weeks of deliberation and testing the flavours we settled on were mince pie, lemongrass & white chocolate, Speculoos & marshmallow, gingerbread, salted caramel and chilli chocolate. We ordered the boxes, ribbons, box dividers and recruited my brother to help with the art work.

It was a really fun process, deciding on the flavours, testing out the recipes and figuring out which moulds to use. We made up about 70 boxes in the end, a total of 840 individual chocolates. The flavours were initially supposed to be Christmas inspired, but there were so many flavours we wanted to include that we ended up just putting together a box of our favourites.

chocolate2

chocolate3

IMG_2481

IMG_2490 IMG_2581 IMG_2586

And then of course in our other classes we also made Christmas related goodies:

christmas

Clockwise: Christmas cake, Yule log, mince pies and stollen

It’s Not Easter But…

I hope everyone had a blessed Christmas and New Year. I have fallen hopelessly behind with blogging so here’s making a start at catching up.

Ages ago we made Easter eggs! :)

We used coloured cocoa butter in a spray can on the inside of the mould before lining them with tempered dark chocolate. Then they went into the fridge to set. Meanwhile we used cocoa butter transfer sheets to decorate some chocolate ribbons and swirls to embellish the final egg.

IMG_1822

IMG_1827

The colours from the cocoa butter spray and the shine of the chocolate really are amazing aren’t they? Then we heated a baking tray and held one side of the egg onto it for a few seconds to melt the edge so that we could stick the two sides together.

IMG_1839

IMG_1845

My egg :)

Updates from the Chocolate Lab

We have done so much in the weeks since I made that first and only post about the Chocolate Laboratory. Since we have now learned the basics of tempering chocolate by hand, we are now exclusively using the tempering machine (and thank goodness because it’s so much faster and easier!)

We have been learning how to make ganache filled chocolates using a myriad of different moulds:

IMG_1743IMG_1748


IMG_1729

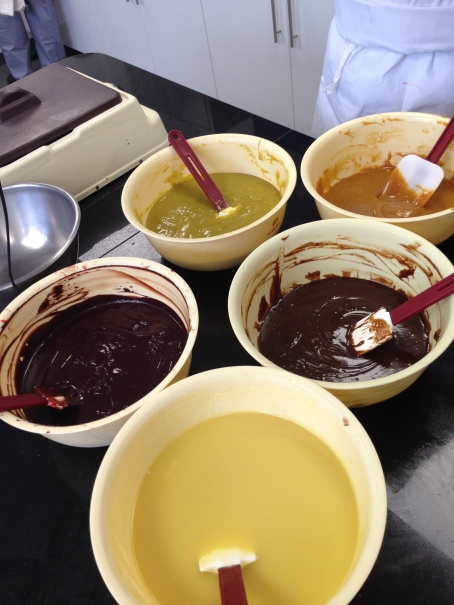
The ganaches: White chocolate & lemon, pistachio, salted caramel and dark chocolate

We have also been conching our own chocolate from the cocoa bean in order to produce a unique “Wesking chocolate bar”. A conche is an insanely expensive piece of equipment which scrapes and mixes cocoa butter and chocolate so that the cocoa butter is evenly distributed. It is at the conching stage that other flavours such as vanilla or coffee essence and sugar can be added to give the chocolate a distinctive taste. A large part of the taste is also dependant on the type of cocoa bean being used and where it is from.

We experimented by varying the percentage of cocoa butter and sugar to cocoa bean to produce a smooth, yet tasty chocolate. We learned that the longer the bean stays in the conch machine the more of its flavour it will lose, but the smoother it will be. We also had to consider how sweet or bitter we wanted it and also how much “dryness” we wanted to feel on the tongue. Supermarket chocolates have a much higher percentage of cocoa butter (or even vegetable oil) to make them feel smooth, creamy and sweet, but so-called “designer” chocolates tend to be more bitter and flavourful. So it’s really a balancing act between the taste and the texture. Personally I find the Westking bar to be slightly too dry for my liking and also a bit acidic on the tongue, but it is an interesting experience to really see the difference in taste and texture when more or less of certain ingredients are added.

This Westking bar is a semi-production and marketing project for the class. We have to make up about 500 bars, decide on the packaging and then sell them in the college shop (when I say shop I mean tiny cart by the front entrance which usually inexplicably only sells pick n’ mix and deodorant). It was an interesting project, if only for the fact that we all had to try and work together to come up with one cohesive idea.

2013-11-14 13.09.47

The draft design

As the packaging says our chocolate is conched for about 36 hours (chocolate can be conched for anything up to 70 or 80 hours) and as it can’t be left running overnight at the end of each day Chef scoops out all the chocolate and turns off the machine. Then each morning in the Chocolate Lab begins with one of us being allocated to “hairdryer” the chocolate. And by that I mean blasting the conch machine with a hairdryer to melt the residual semi-conched beans and cocoa butter left from the night before so that when the machine is turned on the wheels and scraper run smoothly, ready for the chocolate to be poured back in for further conching.

——————

In a fit of creativeness a small group of us have started our own project; designing a box of chocolates to give as Christmas presents. We have Friday’s off and Chef allows us to spend that time in the Chocolate Lab just playing around and doing whatever we want. It’s been a lot of fun testing out different flavours and coming up with ideas…. but there’ll be more on that in a later post…. :)

She bakes at midnight

photo

You know you’re in the Kan household when it’s midnight, the oven is still blasting away and we’re all dozing in front of the tv, timer in hand waiting for the baking to be done. Tonight I had to finish using some leftover short crust from our first assessment on Tuesday.

For our assessment we had 5 hours to make a lemon tart and 12 profiteroles topped with caramel and filled with chantilly cream. We did lemon tarts right at the start of the course, and the profiteroles, well, if you are friends with me on Facebook you will have seen what happened to my poor profiteroles. This is how I got from the first photo to the second:

We had made St Honores that day. It is a traditional French pastry, named after the patron saint of bakers and pastry chefs (yes, there is such a thing!), consisting of a puff pastry base with a ring of choux pastry round the outside, filled with creme chiboust and topped with profiteroles. It had been a long and stressful day in the kitchen. Chef had been shouting a lot and there had been some burnt caramels and some people having to start their choux pastry over again. I was heading up to the changing room, St Honore plus some eclairs made from the extra choux, and of course you only ever trip up the stairs when you’re carrying something that cannot survive a trip up the stairs. It only took a split second, then I was staring at the box sitting on its side on the stairs. And that’s how I ended up with soggy choux buns partly submerged in a sea of creme pat. But hey, it still tasted good!

So back to our assessment, everything was mostly ok, though I made a couple of errors, I didn’t quite blind bake my tart case long enough, it was only juuuuuuust cooked, and then I left my filled tart in the oven slightly too long so it began to separate from the sides of the pastry. My profiteroles were fine, just a little on the large side.

IMG_2052

After presenting our work we had to leave the kitchen whilst Chef examined and tasted what we had done. Kind of like the Great British Bake Off except without any glamour or Paul Hollywood or Star Baker award. Well, I passed :) as did everyone else in the class. There are more photos of our lemon tarts plated up in a modern style here.

We each made a double recipe just in case anything went wrong we would have extra to do it again and so that it how I ended up making a lemon tart and tarte aux pommel (recipe here) at midnight. Tonight’s lemon tart corrected everything I did wrong in Tuesday’s assessment, though I have now made 4 lemon tarts in the last month so I fear will not be making or eating them again for quite a while!